Introduction
Hey girl! Is there anything more annoying than running a ViveTool command, seeing that pretty success message, but then… nothing happens? You restart your PC with so much excitement, but that cute new taskbar or menu is still totally missing!
It feels like you’ve been ghosted by your own computer, but don’t worry, because you are definitely not alone. This usually happens because Windows is being a bit stubborn about refreshing its internal list of ViveTool features.
In this guide, we’re going to dive into some serious problem-solving to find out exactly why your tweaks are hiding. From system reboots that actually work to registry checks, wewill have those ViveTool features showing up in no time!

What Causes Features to Stay Hidden Even After a “Successful” Enable?
When ViveTool tells you a command worked, it just means it flipped a tiny switch in the Windows “Feature Store.” However, just because the switch is flipped doesn’t mean the power is yet flowing to the actual screen.
Sometimes, the internal checks that Windows performs during startup don’t detect the change due to an outdated cache. It is like changing your outfit, but looking in an old mirror, you won’t see the new look until you refresh!
Another huge reason is a mismatch between the ID you used and your actual Windows version. If the code for that ViveTool feature doesn’t exist on your hard drive yet, no amount of enabling will make it appear.
The Gap Between Command Execution and Feature Visibility
The moment you hit enter, ViveTool talks to the Windows system to request a big change. But because Windows is complex, it often requires a deep refresh to actually read those new flags.
If your system uses “Fast Startup,” a regular shutdown won’t trigger the change. This gap is the most common reason why your ViveTool feature is not showing after enabling it today.
Build Compatibility and Version-Specific ID Mismatches
Microsoft changes feature IDs faster than we change our shoes, which makes it hard to keep up! An ID used for a Beta version might be totally different from the one in the Stable version.
If your diagnostic doesn’t start with a build check, you might be chasing features that don’t exist in your version. Always make sure your ID matches your specific Windows build number for the best results.
System Refresh Protocols: Beyond the Standard Restart
If you’ve already restarted once and the feature is still missing, a simple click in the Start menu might not be enough. Windows loves to save its state to boot faster, but this can block new ViveTool feature flags from loading.
We need to perform a “Cold Boot” to force the system to look at the registry with fresh eyes. This is a deeper kind of reset that clears out the temporary memory where old settings might be stuck.
Sometimes, the feature is actually active, but the “Shell” (the part of Windows you see) hasn’t updated. By restarting the explorer process, you can often jumpstart the UI and make missing elements appear!1
How to Perform a Full Cold Boot to Refresh Feature Toggles
- Shift + Shutdown: Hold the Shift key while clicking “Shut Down” in the menu for a deep power-down.2
- Disable Fast Startup: Go to Power Options and turn off “Fast Startup” so Windows doesn’t skip the registry load.3
- Command Line Reboot: Type shutdown /r /t 0 in an Admin terminal for an immediate, forced system refresh.4
- Double Restart: Some features require two full boot cycles to fully initialize all the new visual components.
Forcing a Shell Restart to Trigger Instant UI Updates
If you don’t want to wait for a full reboot, open your Task Manager right now. Find “Windows Explorer” in the list, right-click it, and hit “Restart” to refresh your whole desktop layout.
This refreshes the taskbar and Start menu, which is often where those hidden ViveTool features are waiting. It’s a quick and easy way to see if your ViveTool tweak has finally taken effect!
Deep Registry Verification: Ensuring Changes Are Actually Committed
If the UI still isn’t showing, we need to get a little bit technical and perform some registry checks. ViveTool writes data to a specific area called the “Feature Management” key in your system.
If, for some reason, the tool couldn’t write there, perhaps because of permissions, the feature will stay hidden. Checking this area manually can tell you if the command is actually “stuck” to the system.
If you see your Feature ID listed as “2,” the tool did its job perfectly. If the ID isn’t there at all, then ViveTool didn’t have the authority to make the change!
Manually Checking the Windows Feature Store for Enabled Flags
Open the Registry Editor and look for the specific IDs you tried to enable earlier. If the folder for that ID exists and is set to the correct state, then the tool worked.
If the folder is missing, you may need to run your terminal with higher rights or check your folder settings. This is the ultimate way to verify if your computer is actually listening to your commands!
Navigating to the Feature Management Registry Path Safely
- Address Path: Copy and paste HKEY_LOCAL_MACHINE\SYSTEM\CurrentControlSet\Control\FeatureManagement\Overrides\4 into the top bar.
- Find Your ID: Scroll through the sub-keys to see if your 8-digit Feature ID folder is sitting there.
- Verify Value: Inside that folder, ensure the Enabled State value is set to 2 for enabled ViveTool features.
- Backup First: Always right-click the folder and select “Export” to create a backup before you make any changes!5
The “Build Match” Diagnostic: Verifying OS Version Requirements
The #1 reason features don’t show is using the wrong ID for your specific Windows version. Every time you see a cool new ViveTool feature online, you must check your “Build Number” first.
You can do this by pressing Win + R, then typing winver to view your system details. If you use an ID meant for a newer build, the feature will stay hidden because the code isn’t there!
Why Using 24H2 IDs on 23H2 Systems Won’t Ever Work
Think of it like trying to play a new game on an old console. The software just isn’t there to run it. ViveTool only unlocks what is already hidden in your files; it doesn’t download anything new.
If your version of Windows doesn’t have the files for that ViveTool feature, enabling the ID won’t do anything. Always match your build to the guide you are following for a 100% success rate every time!
Current Feature ID Requirements vs. Windows Build Versions
| New Start Menu | 24H2 (Build 26100+) | 48433719 | High (Needs Restart) |
| Explorer Tabs | 22H2 (Build 22621+) | 37634385 | Guaranteed |
| AI Actions | Canary (Build 27xxx) | 59193521 | Experimental |
| Taskbar Badges | 23H2 (Build 22631) | 35599125 | Stable |
Staged Rollouts and Server-Side Gating: Why Toggles Sometimes Fail
Sometimes, Microsoft uses a feature called “Server-Side Gating” to hide features from some users. This means even if you enable it locally, a tiny bit of code from their servers says “not yet!”
This is common with new AI features or specific regional updates that aren’t ready for everyone. If you live in a certain area, some ViveTool features might be blocked by law or regional settings.
ViveTool tries to bypass this, but sometimes Windows is just too smart for its own good. In these cases, you might need to wait for the official update to reach your region or use a VPN.
Understanding Microsoft’s “A/B Testing” and Hardware Gating Blocks
A/B testing means Microsoft gives a feature to one group of people but not the other. If you are in the unlucky group, your system might have a block that ViveTool can’t easily break.
There is also “Hardware Gating,” where Windows checks whether your PC is fast enough to run a feature. If your hardware doesn’t meet the requirements, the ViveTool feature will stay hidden to protect your performance.
Overriding Regional Restrictions for Global Feature Activation
For some features, you might need to enable a “Bundle” of multiple IDs simultaneously. These are special IDs that enable all the requirements for a feature to finally appear.
If you only enable one part but forget the others, the feature might appear as a blank box or not appear at all. It’s like putting on a dress but forgetting your shoes, the look isn’t complete!
Advanced Recovery: Resetting the Feature Configuration State
If you have tried too many different IDs and now your Windows looks a little weird, it is time for a reset. Conflicting tweaks are a major reason why a ViveTool feature is not showing.
If two different tweaks are fighting for the same spot, Windows might just show the older version as safe. A full reset will clear all your custom flags and return your PC to its factory-default state.
This doesn’t delete your photos or apps; it just tells Windows to stop listening to your ViveTool changes. After a clean reset and a reboot, you can try enabling your favorite ViveTool feature again!
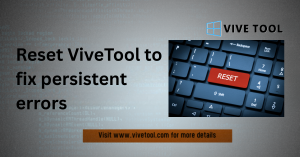
Using the /FullReset Command to Clear Conflicting Tweak History
Open your terminal as an Administrator and type vivetool /fullreset to clear the air. This is the ultimate tool for when things get messy or ViveTool features stop showing up correctly.
It wipes the registry keys we looked at earlier and lets you start over with a fresh, clean system. It is the best way to fix “Flag Fighting,” where different settings confuse your computer.
Step-by-Step Cleanup for a Fresh ViveTool Environment
- Run Reset: Type vivetool /fullreset and wait for the “Successfully reset” message to appear.6
- Restart Twice: Perform two full reboots to ensure the system cache is completely cleared.
- Check Query: Run vivetool /query to ensure the list of custom changes is now empty.
- Single Focus: Enable only one Feature ID at a time and reboot between each for safety.
Conclusion
You did it, girl! You are now a master of fixing those shy, hidden Windows features. By checking your registry and knowing when to reboot, you have beaten the invisible bug!
Windows customization is such a fun way to make your computer feel unique and personal. Now that you know how to make your tweaks actually stick, go ahead and show off that gorgeous new UI to everyone!
Frequently Asked Questions (FAQs)
1. Why does ViveTool say “Success” but the feature is still missing?
This is usually due to “Fast Startup” skipping the registry refresh. Try a “Shift + Shutdown” to do a deep restart and force Windows to see your new ViveTool settings!
2. Is it safe to enable these hidden features?
Generally, yes, but they are hidden for a reason, like being unfinished! Always create a “System Restore Point” before you start, so you can go back if things get glitchy.
3. What is the difference between an ID and a Variant?
An ID is the feature itself, while a “Variant” is a specific version of it (like a different icon).7 You might need to add /variant:1 to your command to see a change!
4. Why do some IDs work on my laptop but not my desktop?
This is usually because they have different Windows Build versions. Check Winver on both. If the numbers aren’t the same, the IDs might need to be different too!
5. Can a Windows Update break my ViveTool features?
Yes! When Windows updates, it often resets the ViveTool feature list to the factory defaults. You might need to rerun your ViveTool commands after a major monthly update.
6. How do I know which ID belongs to which feature?
There is no official list, but you can check the dictionary file in your ViveTool folder. Many tech bloggers also track these IDs for every new Windows update!
7. Why is my registry empty even though the tool said success?
This happens if you didn’t run the terminal as an Administrator. Without those rights, the tool can’t save its work to the registry, even if it says it did!
8. Is there a way to see all my active tweaks?
Yes! Just type vivetool /query in your terminal to see a long list of every feature flag. It shows you everything that has been changed on your system!
Latest Posts: