Introduction
Welcome to this definitive guide on setting up and troubleshooting your HTC Vive Setup system. As an expert with 15 years of experience in managing virtual environments, I understand that the gap between unboxing your VR kit and stepping into a virtual world can often be bridged by a frustrating series of technical hurdles.
From flickering Base Stations to the infamous “Headset Not Found” error, stability relies on meticulous attention to hardware, software, and driver integrity.
This comprehensive article serves two critical purposes: first, to provide a step-by-step troubleshooting path for the most common detection and tracking issues plaguing HTC Vive (and Vive Pro) users; and second, to guide advanced users and developers through the integration of the Vive Input Utility (VIU), a key toolkit for immersive application creation in Unity.
By following this guide, you will master the essential techniques for a perfect setup, ensuring a low-latency, high-fidelity room-scale VR experience every time you step into the chaperone boundaries.
Key Takeaways
- Always start with a power cycle of the Link Box (or converter) to resolve most “Headset Not Found” errors.
- USB chipset conflicts are a frequent cause of detection failure; switching to a USB 2.0 port is the most reliable immediate fix.
- Base Stations must be securely mounted, above head height, and angled downward between 30 and 45 degrees for optimal tracking.
- The Vive Input Utility (VIU) is a Unity plugin for developers, not a consumer application, and it simplifies controller input management.
- Advanced users may need to employ command-line utilities like ViVeTool to manage low-level Windows features that impact PC VR driver stability.
The Foundation: What Hardware and Software Do I Need to Start?
A stable and enjoyable VR experience hinges entirely on a flawless initial foundation. This preparatory phase ensures your host computer is ready, and that all physical connections between the Link Box, the headset, and your PC are secure and correctly configured.
Rushing this stage is the leading cause of persistent setup issues that require difficult manual intervention later on.
Is Your PC Ready? The Essential Compatibility Checklist
Before connecting a single cable, you must confirm your computer is VR-ready and its software is up to date.
- System Specs: Verify that your PC meets or exceeds the minimum specifications for your specific VIVE headset model (e.g., minimum NVIDIA GTX 1060 or equivalent).
- Driver Update: Download and install the latest stable graphics drivers from the NVIDIA or AMD website. Outdated drivers are a primary source of display and performance issues.
- Operating System: Ensure your Windows OS is fully updated. Modern VR components rely heavily on recent Windows patches for stability and low-latency performance.
A quick check using the official VIVE compatibility tool is highly recommended to proactively eliminate hardware compatibility as a troubleshooting variable.
How to Properly Install the VIVE and SteamVR Software Suite
Do not attempt to install SteamVR directly through the Steam client alone initially. Always start by downloading and running the official VIVE Setup program from the HTC VIVE website.
This utility bundles the necessary VIVE-specific drivers, console applications, and the essential SteamVR application, ensuring a synchronized installation sequence. The setup process meticulously guides you, ensuring that the critical VIVE drivers are installed before the headset attempts its first communication with the PC.
Allow the VIVE Setup guide to walk you through the entire software process, granting all necessary administrative permissions when prompted. The software must be fully installed and updated before the first hardware connection is made.
Headset and Link Box Cable Connections
The VIVE headset connects to your PC via a Link Box (or converter for newer Pro models), which acts as a power and data hub. Improper cabling here is a frequent culprit in headset detection failures.
- Headset Connection: Open the small compartment at the top of the headset. Ensure the three primary cables (HDMI/DisplayPort, USB, and Power) are securely seated in their respective ports, often color-coded or grouped.
- Link Box Connection: Connect the other end of the headset cables to the Link Box, noting that the connectors are often color-coded (e.g., orange) to match the Link Box ports.
- PC Connection: The Link Box connects to your PC via a single USB cable and a video cable (HDMI or DisplayPort). Ensure both are plugged into the same dedicated graphics card, not the motherboard’s integrated ports.
- Power: Plug the Link Box power cable into a wall outlet and confirm the Link Box displays a solid status light, indicating it is powered on and ready.
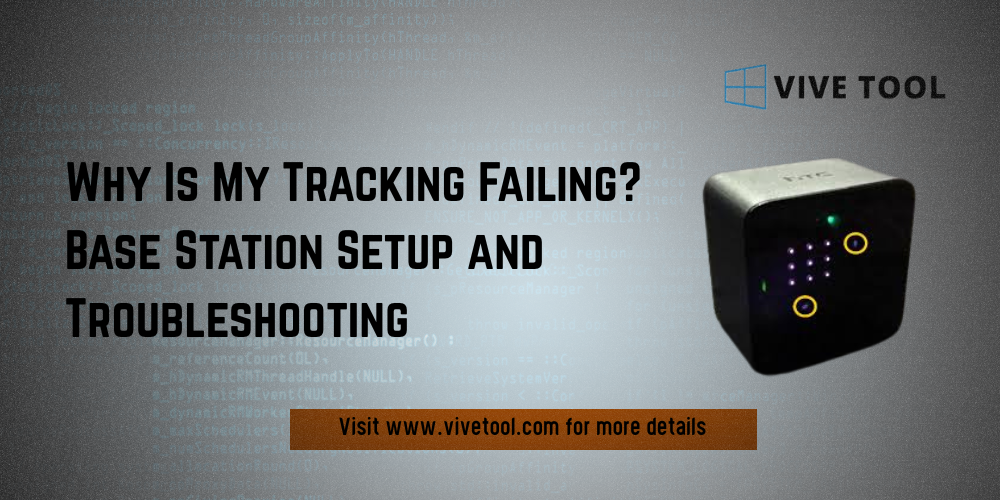
Why Is My Tracking Failing? Base Station Setup and Troubleshooting
The Base Stations (often called Lighthouses) are the heart of the VIVE’s precise room-scale tracking system. Their correct placement and communication are non-negotiable for stable VR. Misaligned or obstructed Base Stations will lead to “drifting,” “jitter,” or complete tracking loss.
Where Should I Put Them? Optimal Placement for Base Stations V1 and V2
Achieving precise, reliable tracking requires following strict physical placement guidelines:
- Height: Both Base Station versions (V1.0 and V2.0) must be positioned above head height, ideally at least 6.5 feet (2 meters) from the floor.
- Position: Place the two stations diagonally opposite each other, aiming for the corners of your designated play area.
- Angle: They must be angled downwards, typically between 30 and 45 degrees, aiming toward the center of the play space. This maximizes coverage and minimizes signal loss when the headset is near the floor.
- Distance: For Base Station V1.0, the maximum diagonal distance is approximately 16 feet (5 meters). V2.0 stations support much larger areas but placement principles remain the same.
Secure them firmly using the provided mounts to eliminate subtle vibrations, which can cause persistent controller jitter.
Sync Cable Use and Obstruction Mitigation
Base Stations must synchronize with each other to define the tracking volume.
- Wireless Sync (Default): Base Stations typically synchronize wirelessly via optical sensors. If the Base Stations display a purple status LED (V1 or V2), it indicates they have failed to wirelessly sync due to an obstruction (e.g., furniture, support column) breaking the line of sight between them.
- Sync Cable (Troubleshooting): If wireless sync fails consistently, you must use the supplied Sync Cable (often required for V1.0 stations) to connect the two Base Stations directly. Ensure the channels are set correctly for cabled sync (typically A and B for V1.0).
You must also check your play area for highly reflective surfaces, such as mirrors, large glass frames, or polished metals, as these can scatter the infrared tracking lasers, leading to inconsistent object position readings.
Diagnosing Tracking Loss and Controller Jitter
Tracking loss, where the virtual world or an object suddenly moves or “jumps,” usually signals a temporary sync or occlusion issue.
- Check Status: Open the SteamVR status window. Grayed-out icons for the Base Stations or Controllers indicate a loss of detection.
- Physical Cause: Persistent jittering or a shaky world is often caused by Base Stations that are not securely mounted and are vibrating slightly due to loose screws or an unstable shelf.
- Recalibrate: If the world appears to be drifting, try running the Room Setup again to recalibrate the floor height and boundary limits.
- IPD: Ensure your Interpupillary Distance (IPD) is set correctly using the mechanical adjustment knob on the headset. Incorrect IPD can cause eye strain and visual blurriness, which may be misinterpreted as a tracking issue.
Troubleshooting Common Vive Detection Errors
The most common and frustrating problems are electrical or driver-related, which prevent the VIVE hardware from being recognized by the PC. These require targeted steps within the Windows and SteamVR environment, going beyond simple re-cabling. Addressing issues at the hardware-driver level is usually the key to restoring full functionality.
The “Headset Not Found” Error: What It Means and How to Resolve It
If you encounter the generic “Headset Not Found” error, follow these methodical steps:
- Power Cycle Link Box: Close all Steam applications, including SteamVR. Unplug all cables (USB, HDMI/DP, and power) from the Link Box for at least five seconds. Plug them back in, starting with the power cable. Wait for the drivers to reinstall.
- Restart SteamVR: Restart the SteamVR application. If the error persists, repeat the power cycle.
- Display Mode: In the SteamVR menu, check Developer settings. Ensure the headset is running in Direct Mode. If it is running in Extended Mode, it can sometimes be mistaken for an external monitor, causing detection failure.
The USB Chipset Conflict (Switching to 2.0 Ports)
One of the most widespread and stubborn VIVE detection issues involves conflicts with specific USB 3.0 or 3.1 chipsets (e.g., certain ASMedia controllers).
- Switch Ports: If your Link Box is plugged into a newer blue or red USB 3.0/3.1 port, immediately try switching to an older USB 2.0 (black) port. HTC often recommends this simple swap due to known chipset compatibility issues that affect the reliability of the constant data stream required by the headset.
- PCIe Card: If switching ports fails, your motherboard’s USB controller may be the source. The official VIVE support pages frequently recommend purchasing a dedicated PCI-Express USB 3.0 card (often with an Intel chipset) to bypass the motherboard’s potentially problematic controller entirely.
Reinstalling Vive USB Drivers in SteamVR
When the headset is not detected, the cause is frequently corrupted or improperly installed low-level USB drivers. The SteamVR application includes a powerful built-in tool to resolve this.
- Access Developer Settings: Open the SteamVR menu (the hamburger icon) and navigate to Settings > Developer.
- Remove USB Devices: Select the option to Remove All SteamVR USB Devices. This action uninstalls all VIVE-related USB drivers from your PC’s Device Manager.
- Clean Reinstall: After confirming the removal, close SteamVR, reboot your computer, and then plug the Link Box back into a reliable USB port to trigger a clean, fresh driver reinstallation by Windows.
Advanced Windows Feature Management for PC VR
For users running into persistent, non-standard Windows conflicts, particularly after OS updates, it may be necessary to interact with hidden system features that could impact performance or driver loading.
ViVeTool, a third-party command-line utility, is a tool power-users employ to manually enable or disable these experimental Windows features. A developer working with the VIVE, for example, might need to know how to use ViVeTool to manage display driver settings or low-latency features that Microsoft has not yet fully exposed in the standard Windows settings panel.
By running specific ViVeTool commands via an elevated Command Prompt, an advanced user can test if an experimental OS feature is interfering with the SteamVR runtime environment. If you are experiencing unusual instability, learning ViVeTool how to use its functionality can give you diagnostic control over the low-level operating system environment critical for PC VR stability.
Advanced Fixes: Controller Pairing and Firmware
Controller issues, ranging from failure to pair to blinking red status lights, often indicate a need for a hard reset, a manual re-pair, or a mandatory firmware update. These problems are often resolved outside of the standard SteamVR setup process.
Controller Pairing Failure (Manual Re-Pairing Process)
If your controllers are blinking blue or have a solid light but are not being recognized by SteamVR, they need to be manually re-paired:
- Start Pairing: In the SteamVR desktop application, open the menu and go to Devices > Pair Controller.
- Activation: Follow the prompts, holding down the App (Menu) and System (VIVE logo) buttons on the controller simultaneously until the LED flashes blue and you hear a chime.
- Reset (If Stuck): If the controller is completely unresponsive (LED off or solid red), perform a hard reset. Hold down the Trigger, Menu Button, Trackpad click, and Grip buttons simultaneously. While holding them, connect the controller to your PC via a Micro-USB cord. Hold for five seconds, then release and unplug. This procedure often revives controllers stuck in a firmware loop or battery-death state.
Forcing Controller Firmware Updates
Firmware updates are vital for maintaining tracking accuracy and controller battery efficiency.
- Check Status: If a controller is connected but showing an exclamation mark (!) in the SteamVR window, a firmware update is required.
- Update Manually: Go to the SteamVR menu Devices > Update Device Firmware and follow the on-screen prompts. Ensure the controller remains connected via USB for the entire process.
- Bricking Prevention: Never unplug the USB cable or allow the controller battery to die during a firmware update, as this can ‘brick’ the device, requiring a difficult, low-level restore.
Understanding Vive Status LED Color Codes
The color of the LED indicator on the headset and controllers provides immediate diagnostic information:
| Color Code | Component | Status/Meaning |
| Solid Green | Headset, Controller | Powered on and tracking correctly. |
| Dim Green | Headset | Ready, but currently in standby mode. |
| Solid Red | Headset, Controller | Physical hardware or critical driver error. Check all power and cable connections. |
| Blinking Red | Controller | Low battery level. Needs immediate charging. |
| Blinking Blue | Controller | Searching for the headset/system during pairing mode. |
| Solid Purple | Base Station | Sync failure. Obstruction present; use the Sync Cable. |
Conclusion
A consistently reliable HTC Vive experience is the result of methodical setup and targeted troubleshooting. By addressing common failure points—especially the finicky USB chipset conflicts, the necessity of Base Station stability, and the integrity of low-level VIVE drivers you ensure the hardware can communicate flawlessly with your PC.
For developers, tools like the Vive Input Utility (VIU) abstract away hardware complexity, allowing focus on immersive design. For advanced users and maintainers of these PC VR systems, understanding diagnostic control, even utilizing command-line utilities like ViVeTool, offers the ultimate control over the entire virtual environment. Attention to detail at every step is the ultimate fix for most VR detection and tracking challenges.
FAQs
What can I do to fix my headset if it’s constantly blinking red?
A blinking red LED indicates a physical hardware error or a major driver failure. Immediately perform a full Link Box power cycle (unplug all three cables from the Link Box for five seconds). If the issue persists, try removing all VIVE USB devices via SteamVR and rebooting for a clean driver installation.
Do I need to use the Sync Cable?
The Sync Cable is a troubleshooting step. It is only necessary if your Base Stations (V1 or V2) display a purple LED, indicating they are unable to wirelessly synchronize due to room obstructions. If they sync wirelessly, the cable is not required and should be stored away.
I am a developer. Do I need to install ViVeTool?
No, ViVeTool is not an official VIVE developer tool. It is a third-party command-line utility for managing hidden Windows features. A developer might need to know how to use ViVeTool if they suspect a specific Windows 11 feature is interfering with the SteamVR runtime or low-level VIVE drivers. It is for diagnostics and power-user system configuration, not application development.
How do I manually reset a completely unresponsive VIVE controller?
If a controller is unresponsive (no LED, won’t charge), perform the hard reset: hold down the Trigger, Menu Button, Trackpad click, and Grip buttons simultaneously. While holding them, connect the controller to the PC via USB for five seconds, then release and unplug. This often forces the controller out of a dead state.
What are the most common ViVeTool commands I would use for VR?
While specific commands change based on Windows versions, common ViVeTool commands would involve enabling or disabling features related to display management, USB power settings, or experimental graphics scheduler options that could potentially impact the dedicated high-bandwidth communication required by the VIVE headset.
Learning ViVeTool how to use these specific functions requires knowledge of Windows Feature IDs, and should only be attempted by advanced users.
How do I install the Vive Input Utility (VIU) into my Unity project?
You download the VIU package from the VIVE Developer site or Unity Asset Store. In your Unity project, use the menu option Assets > Import Package > Custom Package and select the VIU file to import the toolkit’s scripts and prefabs.
Latest Post: